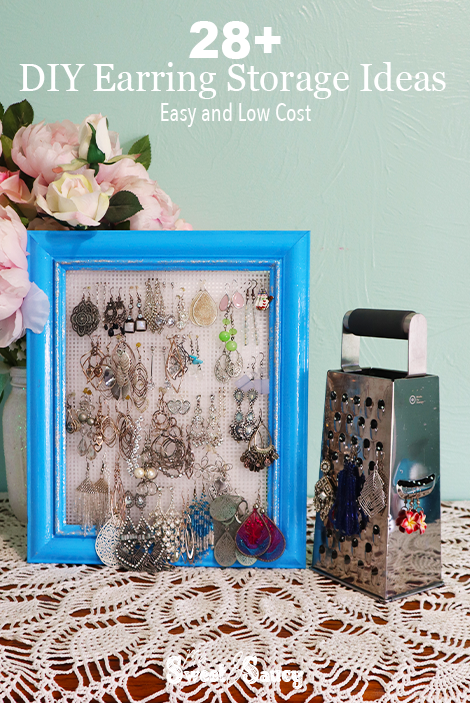
DIY Earring Storage
DIY earring storage does not have to be complicated or cost a lot. There are many beautiful earring holder options available for all different style preferences, plus you don’t have to spend a lot of money to find the best ways to store your jewelry.
Easy Access DIY Earring Organizer
We are so excited to share these easy DIY projects with you to help you organize your pile of earrings. Perhaps you don’t have enough space, or just aren’t sure where to start. I feel you! I felt the same way, I had a lot of earrings, but not enough space, and was in search of the easiest way to find a pair of earrings without having to spend a lot of money on it.
Below are twenty eight different ideas for you, for easy DIY earring storage. Some of these will require more time and effort than others, to make your own earring holder, but all of these ideas will help you to have easier access to your pairs of earrings.
DIY Project to make Cute Earring Holders
These fun, simple, and lows cost DIY projects will help you to make different types of jewelry displays. These DIY earring holder projects will help you make a pretty place to organize your jewelry or give you that shabby chic feel.
Not only are these DIY projects a great way to store your earring collection, but they also can make the perfect gift!
Let’s jump right into all of the different ideas, beginning with my personal favorite!
DIY Earring Holder Ideas
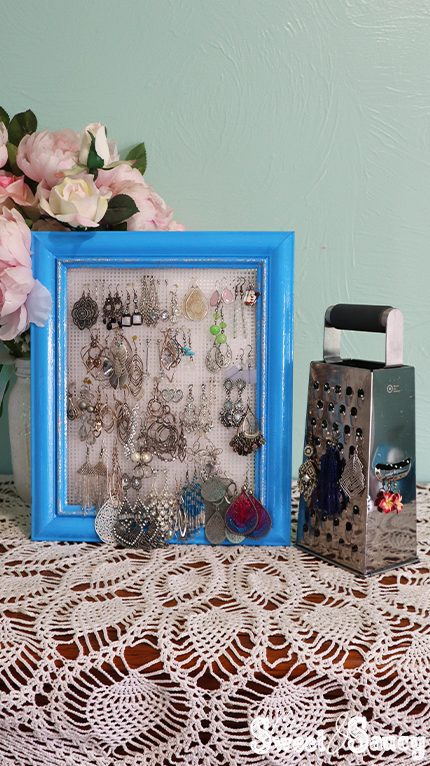
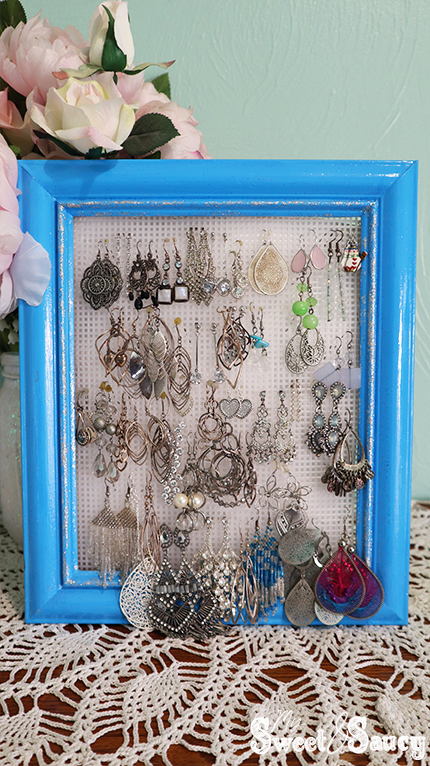
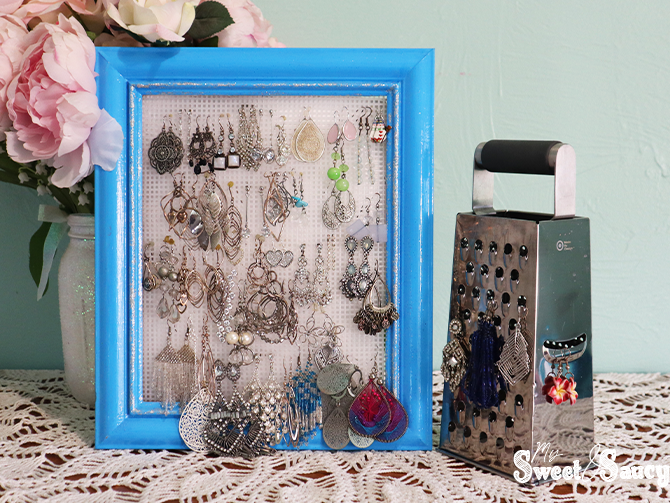
1. Old Picture Frame
Using an old picture frame is an easy and low cost way to organize your earrings and store them on a surface like your dresser, night stand, counter, or hang them from the wall. This project is also great, because you can simply use an old picture frame you have laying around, and then fix it up to be super cute.
Supplies to Make:
– Wooden Frame, no glass needed, just the old picture frame itself.
– Paint, you can use any kind of paint on the frame, some ideas are spray paint from your local hardware store, or acrylic paint from craft stores and a brush. Just be sure to choose your favorite color of paint, and you are good to go.
– Mesh, plastic mesh canvas, chicken wire, wire mesh, metal screen or an aluminum sheet will all work, you can choose your preference.
The key here is to choose something that will go in the old picture frame where a picture would usually be. You want it to have holes in it but still be strong enough to hold the weight of your earrings.
– Hot glue gun, finally, you will need a hot glue gun to hold all the mesh in place.
To Make:
First, remove the old backing from the picture frame, then remove the glass and any picture you may have had in it. This will leave you with only the frame.
Paint the wooden frame any color you wish, then let it dry completely.
When the frame is dried, cut the mesh to fit inside the old picture frame. It should sit where a picture was intended to go. When it is cut to size, heat a hot glue gun.
Working carefully and quickly, run a line of glue around the edges, then carefully press the mesh into place against the glue. I would recommend using a pencil or popsicle stick to press the mesh against the hot glue, so you don’t burn your fingers.
Once the glue is dried, you are good to add earrings to it. You can hang the frame on the wall or lean it against a wall on a flat surface. This will let you organize all your pairs of earrings for easy access.
2. Wire Earring Holder Using Inexpensive Frames
If you don’t have an old picture frame laying around that you can use, there are several great options for inexpensive frames you can find at craft stores, thrift stores, resale stores, or sometimes even at large grocery stores.
When you find a cute inexpensive frame you like, pick it up, then follow the steps above, painting if you want or skipping the step if you are happy with it as is, to convert the average picture frame into a cute jewelry holder.
3. Embroidery Hoop Earring Holder
Adapting an embroidery hoop into earring storage is another great idea. There are a few different items you can use to fill the embroidery hoop to attach your earrings. A few ideas include:
– Cross stitch cloth
– Burlap
– Lace
– Window screen
Each of these options above are great because they are types of cloth that already have holes in them and are easy to hang earrings. All that has to be done is cut the material to size, secure between the hoops and then use glue or clear nail polish to prevent the edges from fraying. Then you are good to use the easy earring storage.
A few other ideas for things to fill an embroidery hoop earring, that you can hang earrings from includes:
– Yarn. Wrap some yarn around the inner ring with embroidery floss until it is covered. Then secure the outer loop to hold the yarn in place.
– Embroidered picture. Another fun way to use an embroidery hoop as an earring holder is to first embroider a picture on cloth fabric. Once finished trim the edges of the cloth so that it is the size of your hoop. You can then hang it on your wall, and also poke earrings through the fabric to hang them from the picture.
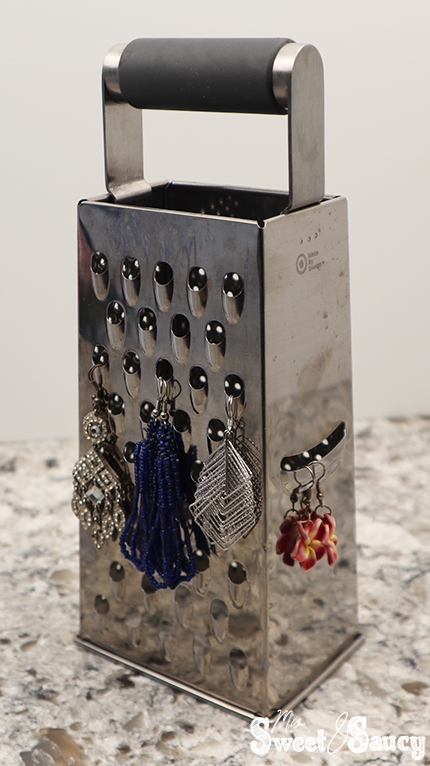
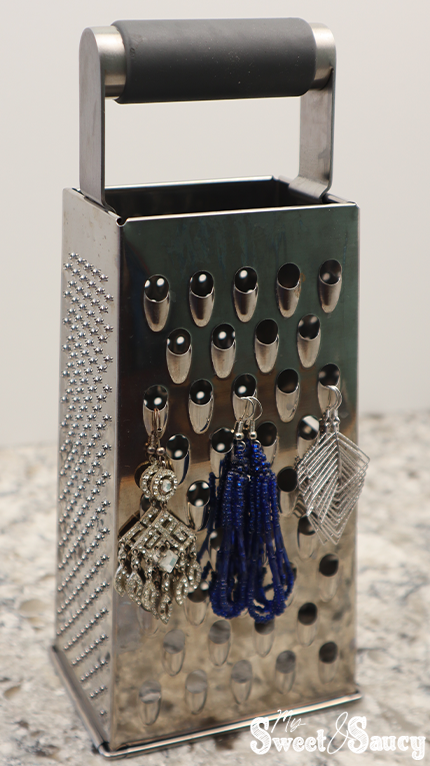
4. Cheese Grater Shabby Chic Dangly Earring Display
Using a box cheese grater as an earring organizer is a fabulous option! Doing this does not require any preparation, but you can paint or decorate it if you want. Once decorated as you wish, all that’s left is to hang your earrings through all the different holes already in the box grater. You can then set the boxed cheese grater anywhere that is easy access for you.
5. Wooden Boards DIY Jewelry Display
Another easy DIY project for you is to make an earring storage using wooden boards. Before you get too worried about needing special tools, or having woodworking skills, for this project you don’t need either!
Supplies to Make:
– 6 pieces of wood
– wood glue
– paint or stain (optional)
– drill bit (optional!)
To make this wooden board jewelry display, I would suggest that you go to Home Depot and pick up a package of wood shims. These are very low cost, and they are already cut to the same size for you. You will also want some wood glue, and you may also want some paint or stain.
Before you begin paint the wood, if you want, and be sure it has completely dried before you assemble the project.
First, lay out the top and bottom wood pieces, use two more boards to help you estimate how far apart they should be. With the top and bottom boards laying on the flat surface, take a dot of wood glue and attach it to a vertical piece on top. Glue together both the top and bottom boards on each side, creating a wooden frame shape. Let the glue dry.
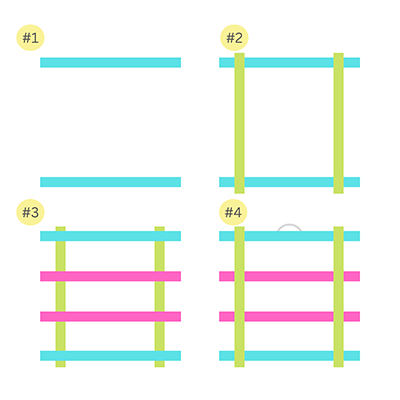
When dry, clip the wooden frame over, and glue two more horizontal pieces to the top, evenly spaced. This will give you more jewelry storage. Let your wooden boards dry completely, the organizer is then ready for use.
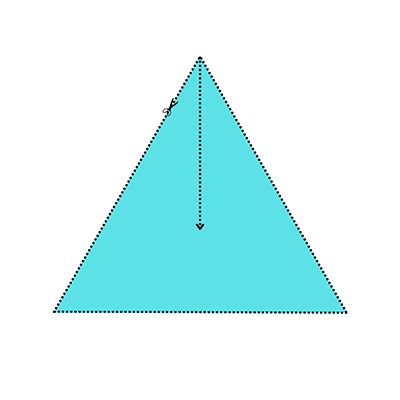
6. Wooden Triangle Earring Holder
A wooden triangle earring holder is another great DIY earring storage option, but it does require a little bit of woodworking skills, or perhaps you can pick up a wooden shaped triangle from your craft store.
To make this you need a piece of wood, or a piece of wood that is already cut into a triangle shape. You also need a drill bit to poke holes in the wood.
If needed, start by putting the wood into a triangle shape. Once it is cut, use a drill bit to poke holes in the wood. This is where your earrings will hang. To finish the project out, you can paint it or stain the wood if you want. You can then set the wooden triangle on a level surface or hang it from the wall.
7. Cardboard Box for Cardboard Cutouts
Another fun and easy way you can make DIY earring storage is to use an old cardboard box. You can cut the cardboard box into your desired shape and cover it with fun paper. This allows you to easily press your earrings into the cardboard to make holes to hold them in place.
8. Acrylic Sheet Earring Holder
A fun but perhaps more challenging option is to use an acrylic sheet as an earring holder. This is when you take an acrylic sheet or piece of plexiglass and cut holes into it. You can then use a wall hanger or cut a piece of wood to use as a stand. Another option would simply be to win the acrylic sheet up against another service to hold it in place.
9. Foam Board Earring Storage
Using foam board as earring storage is a fabulous option because it is low cost, and easy to cut to shape. You can make your own frame for it, use it just as a piece of foam board, or use the foam board inside an old picture frame.
If you want to make the foam board cuter, a great option is to use scrapbook paper to decorate the foam board. Then attach it to your frame and poke your earrings into the foam board.
10. Wire Candle Holder into Earring Holder
A quick and easy item that you might already have laying around your house for DIY earring storage is to adapt a wire candle holder into an earring organizer.
This will typically only work if your candle holder is made of wire and has holes throughout the surface. You can tip the holder on its side, or hang it from the wall, and attach your earrings to it.
11. Wine Cork DIY Jewelry Organizer
Another great option is to upcycle old wine corks to use as jewelry organizers. If you have a lot, then you can make a large surface to hold your earrings, or just a few works too.
The best way to make a wine cork earring holder is to glue wine corks to a piece of wood. Once it’s dry you can hang it on the wall, then simply press your earrings into the wine corks to hold them in place.
12. Plain Wooden Box Earring Displays
Never underestimate what you can do with a plain wooden box. You can add dividers inside of a wooden box to help keep your earrings separate, or you can tip it on its side like a mini closet with earrings hanging on the thread or wire.
13. Thrift Store Finds
If you’re looking for a cheap option, but don’t have anything around the house, take a walk through your thrift store and see what you can find that can easily be adapted into DIY earring storage.
Items like box graters, plates, picture frames, or even bowls and plates can be converted into quick and easy earring storage.
14. Bulletin Board Earring Holder DIY
If you have access to our old bulletin board, or corkboard, this is a to easily adapt to an earring holder. All you need to do this is:
– a bulletin board
– thumbtacks
– string or wire
Using thumbtacks, run the string across your bulletin board. Make sure of thumbtacks are distributed across the string to hold it in place. If your earrings are especially heavy, you may need several thumbtacks. When the thumbtacks are holding the string in place, you can simply add your earrings to the string and viola, you have an easy bulletin board earring holder!
15. Felt Earring Holder
Felt is another great option to use as an earring holder. It is low cost, and it’s easy to deal with. One favorite method is to use a dowel rod and a piece of felt.
Attach the felt around your dowel rod and add string on top to hang it. You can then stick your earrings through the piece of felt and hang the little belt holder anywhere.
16. Piece of Wood Earring Stand
Another great option, if you are good at working with wood, or have some basic knowledge, is to take a piece of wood, usually a rectangle or square, along with another, smaller piece of wood that can be used as the base and attach them together. This forms a wooden earring stand.
Supplies you need:
– wooden square or rectangle
– thin wooden piece
– screws
– drill bit
To make this, use a drill and screw through the bottom of the small piece into your wooden square. When it is attached, take a drill bit into the large wooden square or rectangle, and drill holes to hang your earrings. To finish it out, you can paint it or stain it if you want.
17. Wire Earring Holder
Using wire is a great solution for hanging your earrings. You can attach a string of wire to many different surfaces, but my favorite is to attach it across a picture frame. Once secured, you can hang all different types of jewelry from the wire.
18. Card stock Paper
Card stock paper is a perfect solution when you are looking to store a few pairs of earrings, or even if you’re looking to give earrings away as a gift.
Simply cut out a piece of card stock into a small square or rectangle, then use a hole punch, or even the earrings themselves to poke holes through the card stock paper. You can decorate the paper in cute ways as well.
19. Popsicle Stick Earring Holder
Popsicle sticks are another fun way you can make your own DIY earring storage. When doing this, you can paint the popsicle sticks, or color them for additional fun. To make a popsicle stick stand you will need:
– 12 popsicle sticks
– Hot glue gun or wood glue
Begin by making two triangles out of popsicle sticks, using three popsicle sticks each. These are going to be the sides which will hold the stand up.
Then attach the two triangles by gluing popsicles onto the flat surfaces on one side. There should be enough room to evenly space the remaining popsicle sticks on one side to give you spaces to hang your earrings.
20. Jewelry Boxes
If you’re looking for an easy idea for earring storage, that doesn’t require you making much, you can simply use a jewelry box for your earring storage. If your jewelry box has enough room, you can add dividers, or string wire through areas to give you space to hang earrings.
21. Earring Box
Another great idea is to use a cardboard box, and fill it with foam, then stick your earrings into the foam. This allows you to store your earrings in a box, and out of the way if you don’t want them to be on display.
22. Ring Dish
A ring dish is a great option for quick storage on the go. Especially if you are able to find a dish with a slight rim to it, to help keep your jewelry from falling out.
23. Ribbons and Lace for Stud Earrings
Specifically for stud earring storage, poking holes through ribbons or lace are both great options. This lets you attach the ribbons or lace to anyplace convenient.
24. Old Vinyl Record Earring Holder
Using an old vinyl record is a fun way to store your earrings. To do this, all you need is:
– a vinyl record
– a door hanger
– wood burning pen
Use a wood burning pen to easily poke holes in the old vinyl record where you want. Then let the record cool before handling it. Once cool, you can use a door hanger to hang it up, before adding your earrings to it.
25. Fridge Shelf or Oven Rack Earring Organizer
Wait… what?! That’s right, upcycling an old wire fridge shelf or oven rack is another great idea to make your own earring storage. To do this all you need is:
– old wire fridge shelf or wire oven rack
– command hooks
– paint if you want
To start off, paint the wire rack if you want. Then turn the wire rack on it side, so that most of the wires are going horizontal.
Using command hooks, attach the wire rack to the wall. Then it is ready to hang your jewelry!
26. Decorative Metal Sheet Earring Pyramid
Another fun, but slightly complicated way to make your own earring storage is to use decorative metal sheets and cut them into triangles then assemble into a pyramid.
Supplies Needed:
– 2 decorative metal sheets
– 6 to 8 straws (not bendy ones)
– 3/8-inch-wide corner trim molding
– Super glue
– X-acto knife
– Tin snips
To make this, start by cutting the two metal sheets into triangle shapes. You need to end up with two triangles the same size.
Then take each triangle shape and cut it from the tip down about 3/4th of the way through the center of the triangle. Do this for both triangles.
Next, carefully slide the two triangle pieces together so that they form a 3D pyramid shape.
Cut the corner trim molding into 4 pieces to fit inside each corner of the triangles where they join. Glue them in place for support.
Using the x-acto knife, cut one line down each straw. Glue the straws over the sharp edges of the pyramid. Then let the glue dry.
Spray paint the pyramid so that it is all the same color. When dry add the earrings and you are ready to use.
27. Embroidery Hoop and Dowel Earring Wall Hanging
For a wall hanging jewelry organizer, using an embroidery hoop with dowel rods glued across it makes great storage for not only earrings, but also bracelets and necklaces too.
To make this, all you must do is take an embroidery hoop and use wood glue to attach dowel rods across the hoop. When it is dry, you can easily hang the hoop on the wall, and you are good to use it for all your jewelry. This project is especially great for hoop earrings.
28. DIY pegboard earring display
Finally, pegboard is another great idea for earring storage. You can use just pegboard or cut a piece of pegboard to fit inside of a wooden frame. Because the pegboard already has holes in it, all you must do is organize your earrings and it is good to go.
Easy DIY Earring Holder
Making easy DIY earring storage is much easier than you might have guessed. Hopefully I have given you some ideas to get your creativity flowing, and you are ready to make an eye-catching earring holder. Now you are ready to get started making your own DIY project to help organize your earring collection!
Like this article? Be sure to follow us online for more like it! Find us on Pinterest, Facebook, Instagram, and YouTube.
Share on Pinterest!