
Flower Cupcake Tutorial
This flower cupcake tutorial will walk you through the step-by-step process of how you can easily make beautiful, flowered cupcakes, without needing any special cake decorating tips. This is so easy to do, and they turn out looking gorgeous.
Simple Flowered Cupcakes
Flowered cupcakes don’t have to be difficult or require cake decorating tips in order for you to make them beautiful. Let’s look at what you will need in order to make these easy and beautiful flowered cupcakes.
Easy Flowered Cupcake
What You Will Need
Cupcakes. You will want to have cupcakes that have been completely baked and are cooled before you begin decorating them. You can use any flavor or recipe for your cupcakes and decorate them for this flower cupcake tutorial.
Buttercream. For these kinds of flowers, it will work best if you are using a thick buttercream frosting. This will enable your flowers to hold their shape better.
Plastic piping bag. We recommend using a plastic disposable pastry bag to pipe your frosting into the flower shapes. It’s important that it be a plastic disposable bag because we are going to show you how to cut it into the correct shape to make your flowers.
Food coloring. You can use any color you wish for your frosting. You can use multiple colors if desired, or all one color. It’s entirely up to you.
How to Make Easy Flower Cupcakes
Begin first by baking your cupcakes, then allow them too completely cool. While they are cooling, prepare your buttercream, and add whatever shade of food coloring you wish to use.
When you are ready to frost the cupcakes, take your plastic disposable pastry bag, and cut it straight across, about 1 inch from the tip.
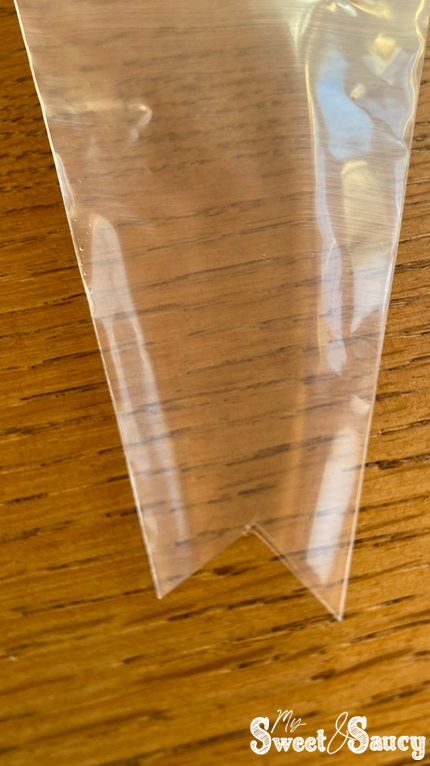
Please note that however high up you cut the pastry bag, will determine how big of flower petals your cupcakes have.
Now that your disposal bag has been cut straight across, we need to do one more cut. Starting from the edge of the bag, cut towards the center about ½ inch. Then turn the bag over and repeat this cut from the other side, cutting ½ inch deep, so that your cuts meet in the center. This will give you a V shape that you have cut out of the bottom of the bag. Leaving you with a bird beaks shape at the end of your plastic bag.
Now your piping bag is ready to be filled with whatever color of buttercream you intend to use for the flower petals.
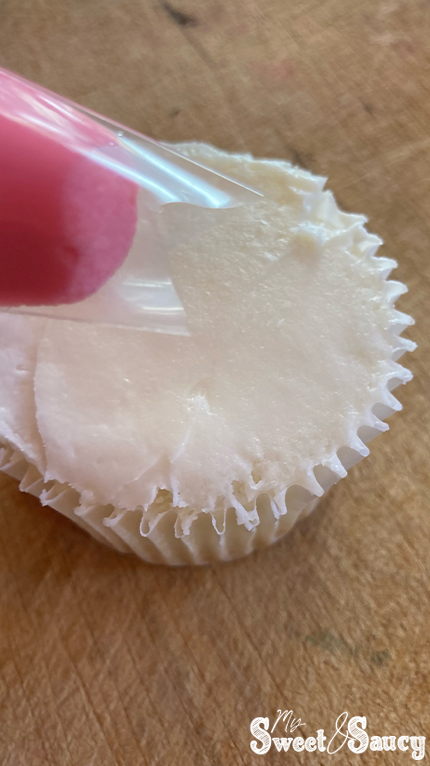
Start by covering your cupcakes in a layer of frosting. You can cover them with green to make it look like the flowers are sitting on a background of grass or green foliage, or you can use another color as your base.
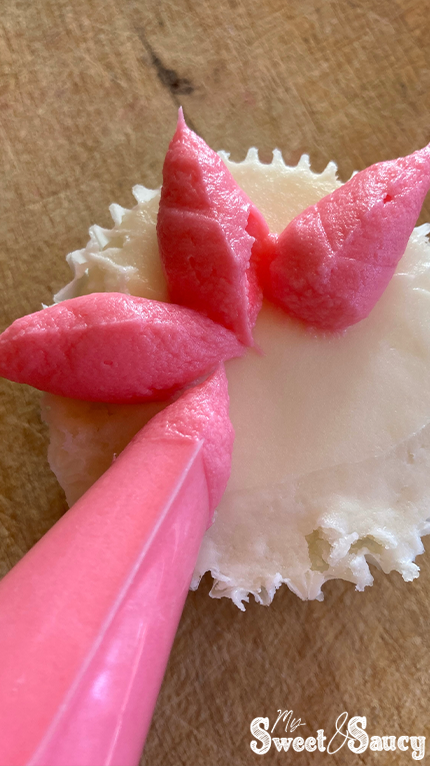
Now take your frosting filled piping bag and hold it so that the seams are facing up and down. Like a bird’s beak.
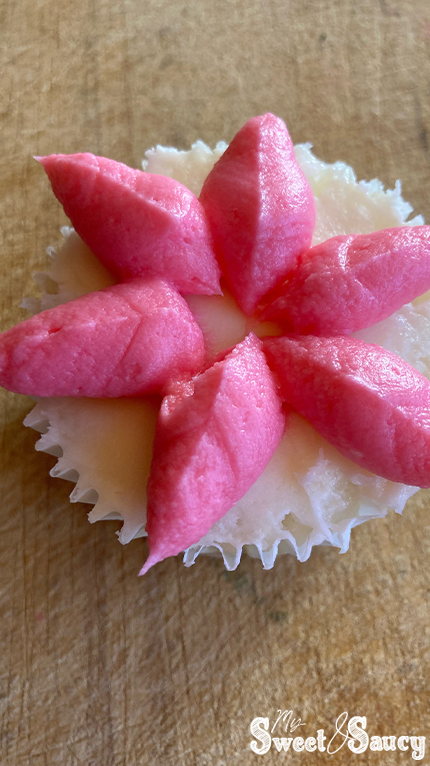
Starting near the center of your cupcake, put pressure on the frosting bag as you are slowly pulling it away. When you get near the end of where you want the petal, stop putting pressure and pull away quickly to give your flower petal a pointed end.
You may want to practice creating the flower petal a few times before trying it on your cupcake. Remember practice makes perfect, so don’t feel bad if you don’t get it on the first couple of tries.
As you are frosting the cupcake with petals, you can add as many petals as you wish. Typically, we can fit about five or six on the bottom layer.
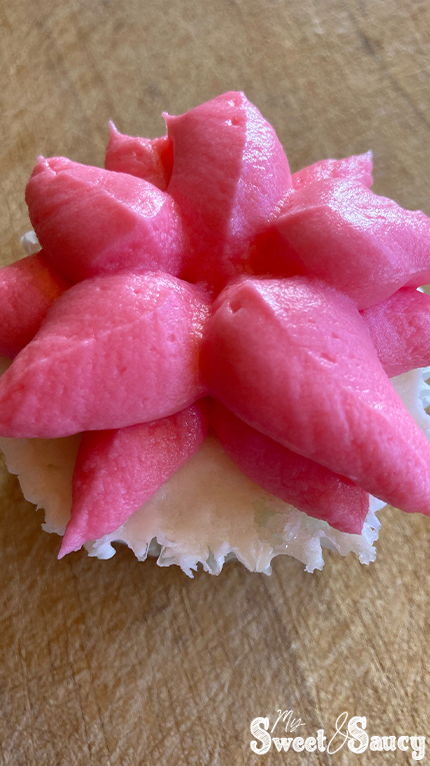
You can repeat this flower petal making process on top of the first layer of flower petals to create a second layer which will give your flower depth.
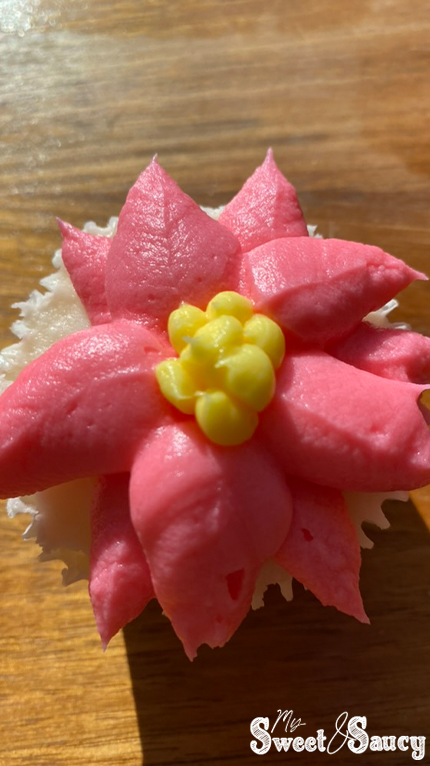
Once your second layer is created, you can fill another plastic bag with a complementary color, then simply cut the bag straight across. Add the complementary color into the center of your flower, with a few dots.
Now you have a beautiful and simple, flowered cupcake to enjoy. Repeat this process with all your cupcakes until they are frosted.
Tips & Tricks
Experiment first. Before piping your flower petals directly onto the cupcake, we like to try piping into the frosting dish, or onto a cutting board. This allows us to practice getting the right shape and technique before trying it on the actual cupcake.
Improvise and get creative. Feel free to mix things up however you desire. You can decorate your flowered cupcakes with other additions or adapt this tutorial however you wish.
Storage
Most buttercream frosting cupcakes should be stored in the fridge, especially if you are in a warm and humid location. For the best results you will want to store them in the fridge in an airtight container for up to a week.
Variations
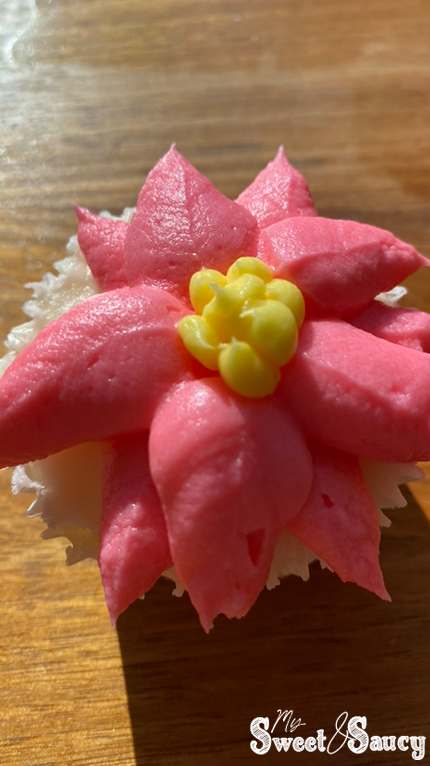
This flower cupcake tutorial shows you how to easily make flowers to decorate your cupcakes, without any specific cake decorating tip. Not only can you make beautiful flowers, but one of our favorite variations is to make poinsettias.
Poinsettias. One of the best variations to this cupcake tutorial is to make poinsettias out of these flowers. Basically, all you do to make these, is make your frosting a bright red color, and use a yellow center. We like to put this on a white or green background.
Leaves. Another way you can mix things up is to use this flower cupcake tutorial, with just the base layer of petals as leaves, then top with a rose if you want. Although this is a little bit more complicated, trying to add a rose to the center.
FAQs
Which buttercream is best for piping flower?
A simple buttercream recipe works well for piping these flowers. Make sure that you create the buttercream so that it is a bit thick, that way your flowers will hold their shape well.
How to make fall flower cupcakes?
You can easily adapt these flowered cupcakes into fall flower cupcakes, simply by dying your frosting with fall colors.
Easy Flower Cupcake Tutorial
This easy flower cupcake tutorial allows you to make beautiful flowered cupcakes, without requiring any special cake decorating tips. Once you practice, and get the hang of it, this flower cupcake tutorial is very easy to follow, and makes beautiful flowers.
Like this article? Be sure to follow us online for more like it! Find us on Pinterest, Facebook, Instagram, and YouTube.
