How to Tie Dye with One Color
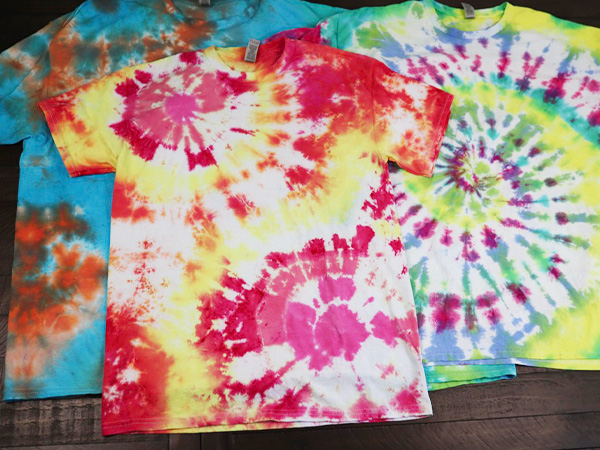
Often when we think of tie-dye, we think of many different colors dyed together, often bright colors that result in a vibrant project. However, there is a way to only tie dye with one dye color, and we are going to explore exactly how to tie-dye with one color, including different tips and tricks to help your project turn out amazing.
Tie-dying with one color is a great project if you want to enjoy just one vibrant color instead of many different vibrant colors. Tie-dying with one color is great because you don’t have to cover the entire shirt with a single color, instead, you need just enough dye to make your desired pattern. This is a great way to use leftover dye, or simply enjoy a single-color tie-dye pattern.
Let’s look at the different materials you want to have on hand in order to begin your tie-dye project with one color of dye.
Basic Tie Dye Supplies
Cotton T-shirt. It will work best if you have a white cotton T-shirt on hand. It doesn’t have to be new, it can be an old shirt, but it will work best if it has been pre-washed with only laundry detergent.
Squeeze Bottle. You will also want to have a squirt bottle or squeeze bottle on hand so that you can easily squeeze the color dye into the correct location on your shirt.
Rubber Gloves. Using rubber gloves while your tie-dye is a must, otherwise, the dye will get on your hands and is very difficult to remove. We recommend using disposable plastic gloves, but you can use reusable rubber gloves if you need to. Be sure to rinse them off when you are done.
Elastic Bands. You will also want to have rubber bands on hand to hold the T-shirt in place after you fold it. It’s best if you don’t have any attachment to the elastic bands so that they can be thrown away when you are done.
Plastic Bag. You will also want to have disposable and sealable plastic bags on hand to store the T-shirts in after they are dyed. This is an important step, that you do not want to overlook. If you do not have a plastic bag that seals, then you can also use plastic wrap, to hold the moisture in while the T-shirts set.
Powdered Dye. You also want to have your desired color of powder dye on hand. We will take a deeper look into what types of dye work best below.
Paper Towels. Paper towels are optional, but you may want to have some on hand to help soak up any dye that escapes from where you want it to be. Paper towels are key to helping you clean up any mess right away.
Plastic Tablecloth. If you were trying to tie-dye in a location, but you do not want to get dyed, it’s a good idea to cover any surfaces with a disposable plastic tablecloth before you begin. This will help to protect the work surface.
Wire Rack. If you are tie-dying inside, in a location such as your kitchen sink, then we recommend using a wire rack, such as a cookie cooling rack, to create your tie-dye project. This will help to keep the tie-dye above any excess dye so that you only get the colors where you want them to be.
Types of Dye
There are many different types of dye to choose from when you walk down the aisle of your local craft stores. Determining which kind of dye is the best for tie dying is half the battle of creating a gorgeous tie dye project.
Depending on your situation, if you want to make only one shirt, with one color dye, then you may want to select your colored dye powder, and buy only a small package of that powder die. There are also many other types of tie-dye kits you can choose from.
When it comes to selecting the correct tie dye kit, there are so many options it can be very confusing. You want a tie-dye kit that’s going to provide beautiful, bright colors, and not every tie-dye kit on the market will work well.
Tulip one-step dye kits are a great option. Tulip one-step dyes do not require a lot of additional ingredients. The great thing about these one-step dyes is that they have a soda ash solution included in the dye, so you don’t have to go out and buy that too.
You will want to make sure that whatever type of powder dye you select is made to react with natural fibers such as cotton and linen. You will also want to double-check what temperature of the water is needed, often for this type of dye, you will need either cold water or lukewarm water.
You will also want to read the packaging to see how far the dye will go if you are making more than one tie-dye shirt with one color. Often, a tie-dye kit will only make a few, unless you get the party pack which typically makes six projects. Because all tie-dye kits and powder die packages are different, make sure to double-check how far the amount of dye your package contains will go.
A Note Ond Rit Dye
RIT Dye has been around for many years and works very well if you are wanting to change the color of an entire fabric item. However, we do not recommend using RIT dye for tie-dye projects, because the dye is likely to run, and not stay in the fabric, to create your beautiful tie-dye creation as you would prefer. If you’re going to use powder dye packages, then we recommend using the Tulip brand dyes, because will produce much better results.
Tie Dye with One Color Patterns
There are many different ways you can fold your T-shirt, to make cool tie dye patterns. Even though you are using one color, these tie-dye techniques for folding your shirt in different ways will produce awesome results. Let’s look at some of the different tie-dye patterns you can use to tie-dye with one color.
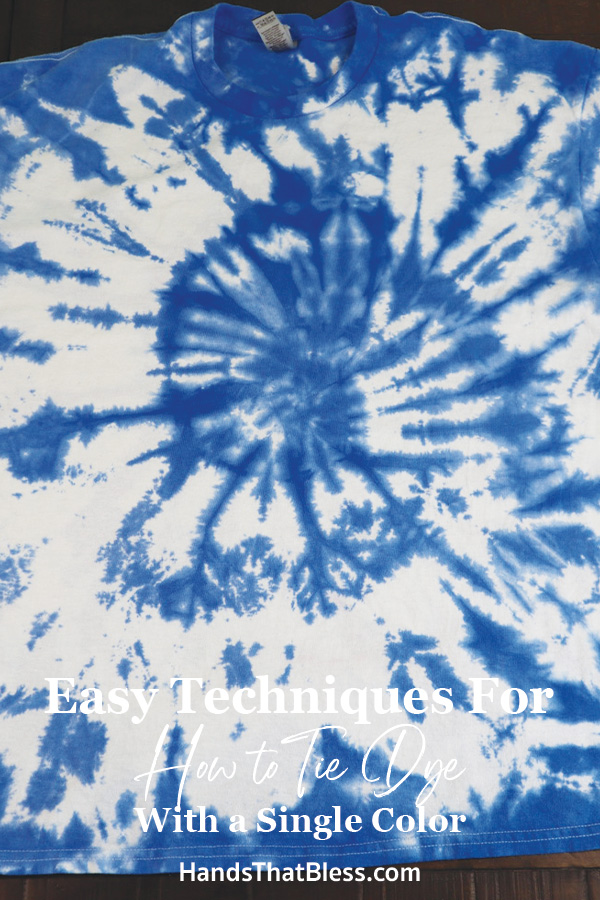
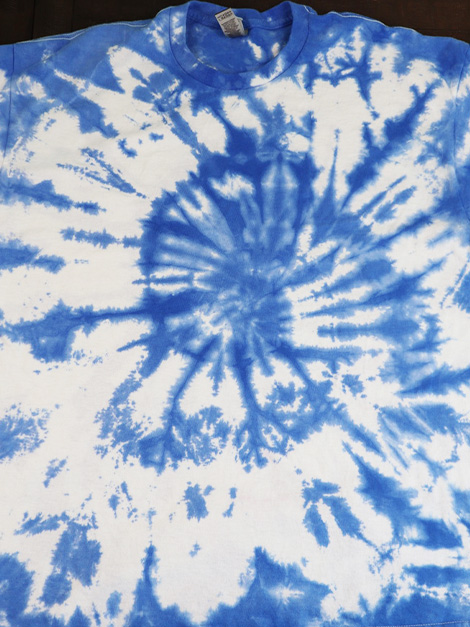
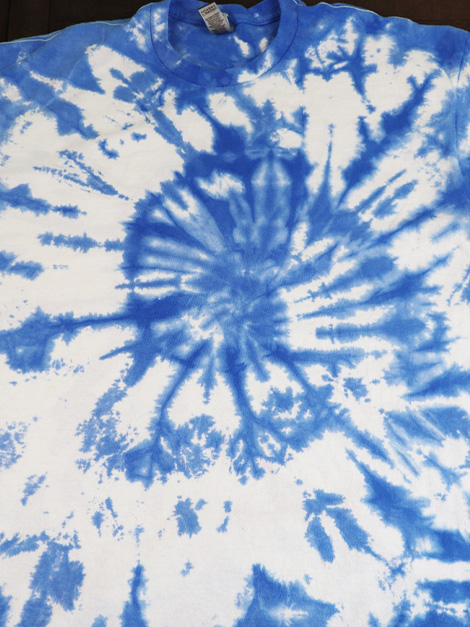
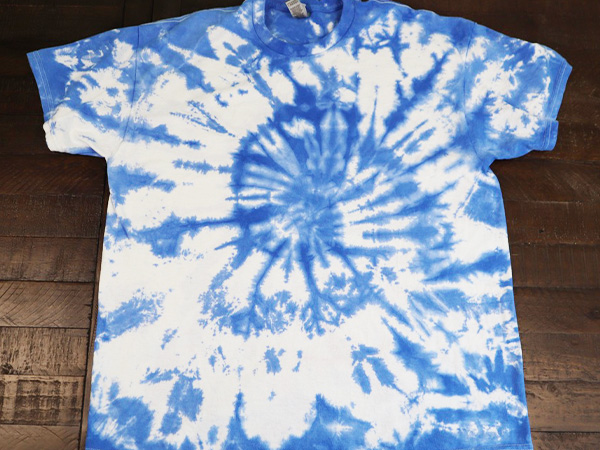
Spiral Tie Dye Pattern
One of the most iconic tie-dye patterns is the spiral tie-dye pattern. To make this pattern, you will want to pinch the center of the shirt, or anywhere in the middle of the shirt where you want the center of the spiral to be.
Then continue holding and twisting the shirt until it folds upon itself. You will want to carefully guide the folds as you twist so that they stay nice and neat.
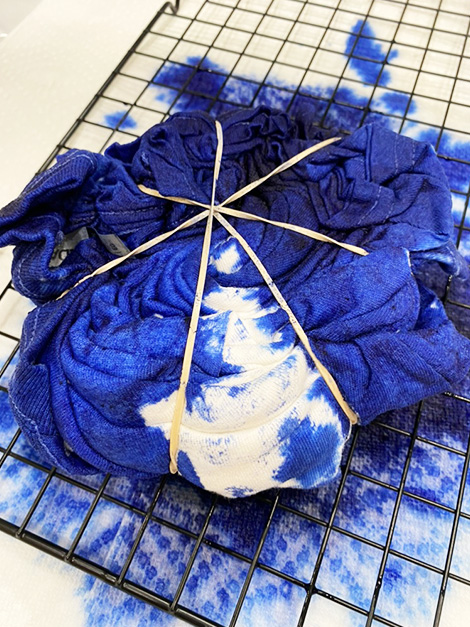
When the whole shirt is twisted, secure it in place with rubber bands. Arrange the rubber bands across the T-shirt to divide each section into pie-shaped pieces.
Tips for Spiral Tie Dye with One Color
When you dye a spiral tie-dye pattern, with only one color, it’s important to use the rubber bands as your guide for different section dividers. Make sure to leave white space in between, so that you can tell the different variations of the one color you were using.
Tie Dye Pattern Ideas
Vertical Stripes
Another fun pattern you can make using only one color of tie-dye is to make vertical stripes. To fold your T-shirt into vertical stripes, you will want to place the shirt on a flat work service. Have a T-shirt facing you, with the neckline at the top.
Carefully fold the T-shirt into fan folds starting at the bottom. Working back-and-forth, so that the folds are approximately 1 to 2 inches wide. Continue folding in this method, until the entire shirt is folded into a fan, fold from the bottom to the top.
Secure the shirt in place with rubber bands, all the way across the shirt. Make sure you use plenty of rubber bands to secure it in place.
Apply the dye color to your T-shirt using the rubber band in sections as your dividers. You also want to leave white space in between where your tie-dye color is applied. When using only one dye color, I recommend that you apply some sections darker than others, and other sections later, so that you have variations of the same shade of color across the T-shirt.
Horizontal Stripes
Make horizontal stripes, you will want to leave the shirt on a flat work surface. Have it laying horizontally in front of you, so if the color of the shirt is on your left-hand side, in the bottom of the shirt is on your right-hand side.
Starting with the sleeve, make a fan fold, approximately 1 to 2 inches wide, from one side of your shirt to the other side of your shirt. When the shirt is folded, secure it in place with rubber bands from the neck to the waistline of the T-shirt.
When you go to apply the dye color, to your folded T-shirt, use the rubber band as dividing sections to apply your dye color. Make sure to leave some space in between and apply sections of color that are darker than others.
Diagonal Stripes
There are a couple of different ways that you can go about folding a T-shirt for a diagonal striped tie-dye pattern. The best way, I recommend folding a diagonal striped tie-dye shirt, is first to find a washable marker, and draw a straight diagonal line from one corner to the other corner across your shirt.
When you have the straight line drawn with a washable marker, gently gather the shirt up on that straight line, keeping it straight as you go.
When that line is straight, and gathered all the way across the T-shirt, secure that line in place with a rubber band. Then straighten out the shirt on both sides of the secured rubber band.
Make sure that the shirt gathers nice and neat, then secure both sides of the shirt with rubber bands working your way out from the drawn line. When the shirt is secured all the way across with rubber bands, you can start applying the dye color.
Use the rubber bands as sectional dividers to apply the dye. Apply the dye color dark in some areas, and light in other areas. Make sure to leave a little bit of white space in between, so if the shirt doesn’t end up being a solid color.
Now that you know how to fold a T-shirt so that you can dye it with a single color, let’s look at some keys for success, followed by the step-by-step process you will want to follow, in order, for your tie-dyed shirt to turn out amazing.
The Key to Success: How to Tie Dye with One Color
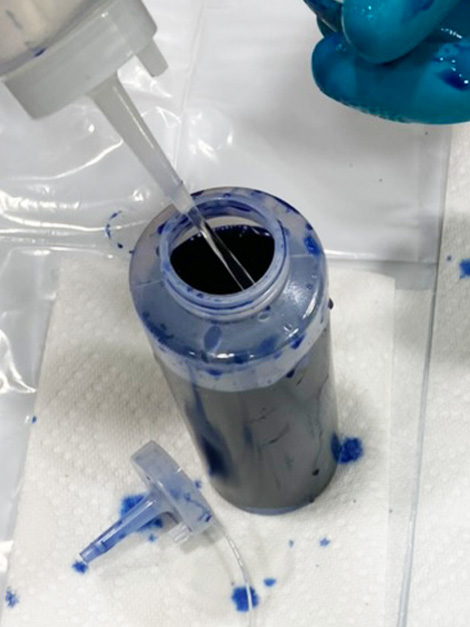
Okay, listen up because this is very important! When tie-dying with one color, you first want to mix up the color in your tie-dye bottle. After the color is mixed up, apply the dye to various portions of your tie-dye project, leaving a lot of sections white.
When the first sections of your day are now applied, take your bottle with tie-dye color, and add additional water. Usually, somewhere between ¼ cup and ½ cup. This will slightly dilute the bottle of tie-dye color. Take this new color of slightly diluted colors and added to your tie-dye project in a few more sections.
Now you have two different shades of the same color applied to your tie-dye project. Go back and add additional water to your bottle of tie-dye color. This will slightly dilute your tie-dye bottle color even more. Apply this new color in sections to your tie-dye project.
One more time, add additional water to the remaining color in your tie-dye bottle. This will give you a very light shade of the same color tie-dye, to apply to the remaining sections of your project.
Slightly diluting your tie-dye bottle of color each time will give you a guaranteed result of different shades of the same color each time you apply your dye color. This is the easiest, and the surest way of ending up with different shades of one color on your tie-dye project. This way you can ensure that you do not end up with a single-color project.
When applying your dye, make sure to flip the tie-dye project over, so that both sides of your project get the same colors. This is very important that you remember to do this as you go because you are diluting the water to create different shades of the same color.
How to Tie Dye with One Color
Step 1: Pre-Wash
When making any tie-dye project, it’s very important that you start out first by washing your cloth with laundry detergent in the washer. Do not use fabric softener for this washing. This will remove any residue from the factory and give you the best results on your tie-dye project.
Step 2: Fold and Secure with Rubber Bands
Next, you want to determine from the different patterns above, how you fold your white shirt from the different sections as instructed above. When you select a folding pattern, fold the shirt, to secure it in place wrap rubber bands around the folds.
Step 3: Prepare your Work Surface
The best way to tie dye is outside so that the mask doesn’t ruin anything inside your house. However, wherever you end up tie-dying, we recommend spreading a plastic tablecloth across your flat surface to protect it.
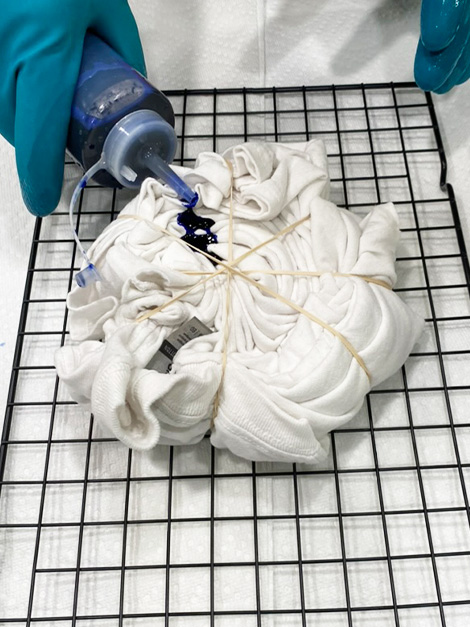
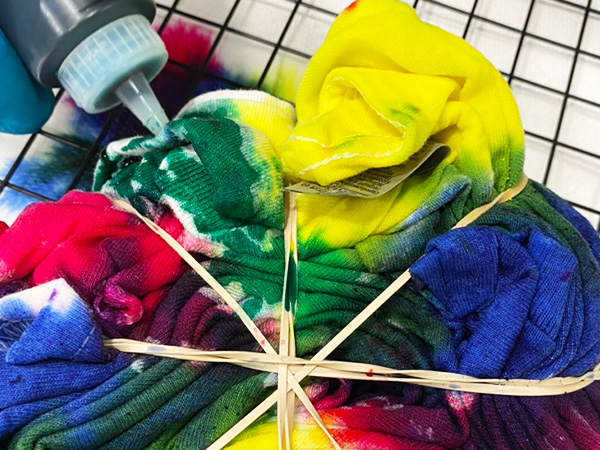
Step 4: Mix and Apply the Dye
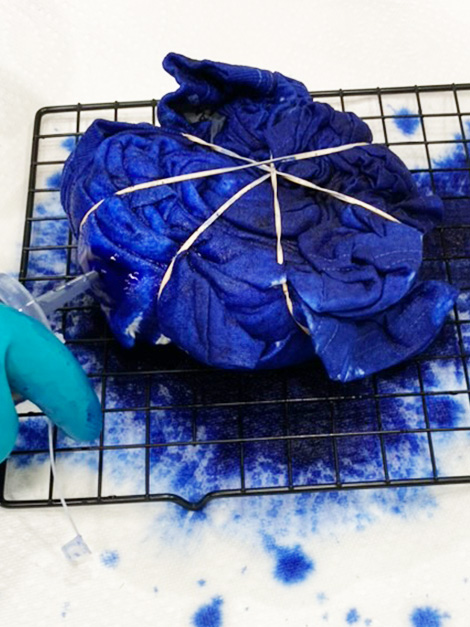
Wearing gloves, mix up the powder die, with cold or lukewarm water. Shake thoroughly so that the dye powder dissolves completely in the water. Once the dye powder is dissolved, your dye mixture is ready to be used.
Apply your desired color of dye across the front of the shirt, using your rubber-banded sections as a guide. Make sure to leave some white spaces for the dye to give you the tie-dye effect. When making a tie dye shirt with only one color, I would suggest making some sections darker, and other sections lighter, so that you have different shades of the same color. Make sure to leave some white areas as you work, so that you don’t end up with a solid color when you are done.
After the front of the shirt has had fabric dye applied, turn the shirt over, and repeat the same exact pattern on the back, being sure to leave white areas.
Step 5: Set the Dye
After you are satisfied with your tie dye project, place the project into a sealable plastic bag. Remove any access air, then seal it securely. Place your tie-dye project in a warm, but dry location to let the dye set. Ideally, you will want the project to set secured in a plastic bag, at 70°F, so that you get the best results.
The length of time the tie-dye project should set, is between 12 and 24 hours preferably. However, the tie-dye project must set a minimum of 6 to 8 hours, but you will get better results when it has been set for 12 to 24 hours.
Step 6: Rinse
After the tie-dye project has set, you will want to put gloves back on and remove the project from the plastic bank and place it under cold running water. Hold it under the cold water until the water runs clear. This process removes any excess dye.
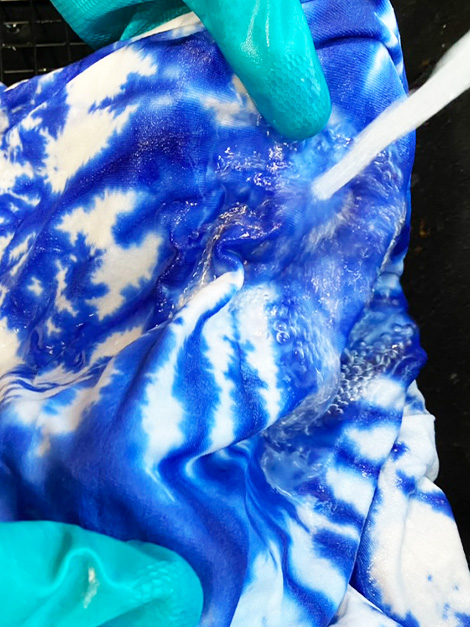
After the water runs clear, remove the rubber bands, place rubber bands aside, and lay the tie-dye project flat. Place it back under the cold running water, until the water runs clear once more. After the water is clear a second time, gently squeeze out any extra water, and put your tie-dye in the washing machine.
Note: Rinsing your tie-dye project will lighten the finished results because you are literally rinsing out any dye that has not set into the fabric. This is why it is important to allow 12-24 hours for the dye to fully set before rinsing it out.
Step 7: Wash and Dry
Place all of the tie-dye into the washing machine, for this first load you will only want to wash tie-dye and add your desired laundry detergent. Turn the washing machine, so that it is using hot water, for the best results you want to use as hot of water as possible. Wash the shirt like normal. Then dry the tie-dye, until it is completely dry. Your tie-dye T-shirt with one color is now ready to wear and enjoy.
A note on Future Washes
After your tie-dye project has been washed the first time, I would suggest that you wash it separately for the next time or two, then after that it is good to go in with the rest of your laundry. After the first washing is complete, you can go back to washing your load of laundry with cool water rather than hot water.
Tie Dye Project Variations
Most tie-dye projects are done with a white T-shirt. This is the most common, and easiest way to tie-dye. Also, most tie-dye projects are done with powder dye, mixed with water.
In addition to using powder dye mixed with water, there is a way that you can use powder dye sprinkled on your folded shirt, then finished off by setting ice on it and allowing the ice to melt into the shirt. This is known as the ice dye method. This is a fun variation if you want to mix things up, but you will need a place for the dying project to set for a long time.
You can also tie-dye dark-colored shirts. This is a bit more complicated because essentially you must first tie-dye the dark-colored shirt with bleach, then rinse it out, and set the day. After the dark-colored shirt has been tie-dyed with bleach, you can then go back and add dye colors to the bleach sections if desired. This is another fun way to mix up your average tie-dye with reverse tie-dye.
Tie-Dye Success
Now they know the different methods you can use to fold your tie-dye, to create your desired tie-dye design, it’s time to get started making your tie-dye project with one color. Making tie-dye is so much fun, and it is the perfect activity for warm weather.
I hope that you have a fun time making your tie-dye project with one color, and make lots of fun memories in the process!
Find Us Online!
Be sure to follow us online on your favorite social media platform!
You’ll Also Love
How to Tie Dye with One Color
Materials
- Cotton T-shirt
- Squeeze Bottle
- Rubber Gloves
- Elastic Bands
- Plastic Bag
- Powdered Dye
- Paper Towels
- Plastic Tablecloth
- Wire Rack
Instructions
Step 1: Pre-Wash
- When making any tie-dye project, it’s very important that you start out first by washing your clothes with laundry detergent in the washer. Do not use fabric softener for this washing. This will remove any residue from the factory and give you the best results on your tie-dye project.
Step 2: Fold and Secure with Rubber Bands
- Next, you want to determine from the different patterns above, how you fold your white shirt from the different sections as instructed above. When you select a folding pattern, fold the shirt, to secure it in place and wrap rubber bands around the folds.
Step 3: Prepare your Work Surface
- The best way to tie dye is outside so that the mask doesn’t ruin anything inside your house. However, wherever you end up tie-dying, we recommend spreading a plastic tablecloth across your flat surface to protect it.
Step 4: Mix and Apply the Dye
- Wearing gloves, mix up the powder die, with cold or lukewarm water. Shake thoroughly so that the dye powder dissolves completely in the water. Once the dye powder is dissolved, your dye mixture is ready to be used.
- Apply your desired color of dye across the front of the shirt, using your rubber-banded sections as a guide. Make sure to leave some white spaces for the dye to give you the tie-dye effect. When making a tie-dye shirt with only one color, I would suggest making some sections darker, and other sections lighter, so that you have different shades of the same color. Make sure to leave some white areas as you work, so that you don’t end up with a solid color when you are done.
- After the front of the shirt has had fabric dye applied, turn the shirt over, and repeat the same exact pattern on the back, being sure to leave white areas.
Step 5: Set the Dye
- After you are satisfied with your tie dye project, place the project into a sealable plastic bag. Remove any access air, then seal it securely. Place your tie-dye project in a warm, but dry location to let the dye set. Ideally, you will want the project to set secured in a plastic bag, at 70°F, so that you get the best results.
- The length of time the tie-dye project should set, is between 12 and 24 hours preferably. However, the tie-dye project must set a minimum of 6 to 8 hours, but you will get better results when it has been set for 12 to 24 hours.
Step 6: Rinse
- After the tie-dye project has set, you will want to put gloves back on remove the project from the plastic bank, and place it under cold running water. Hold it under the cold water until the water runs clear. This process removes any excess dye.
- After the water runs clear, remove the rubber bands, place rubber bands aside, and lay the tie-dye project flat. Place it back under the cold running water, until the water runs clear once more. After the water is clear a second time, gently squeeze out any extra water, and put your tie-dye in the washing machine.
- Note: Rinsing your tie-dye project will lighten the finished results because you are literally rinsing out any dye that has not set into the fabric. This is why it is important to allow 12-24 hours for the dye to fully set before rinsing it out.
Step 7: Wash and Dry
- Place all of the tie-dye into the washing machine, for this first load you will only want to wash tie-dye and add your desired laundry detergent. Turn the washing machine, so that it is using hot water, for the best results you want to use as hot of water as possible. Wash the shirt like normal. Then dry the tie-dye, until it is completely dry. Your tie-dye T-shirt with one color is now ready to wear and enjoy.
A note on Future Washes
- After your tie-dye project has been washed the first time, I would suggest that you wash it separately for the next time or two, then after that it is good to go in with the rest of your laundry. After the first washing is complete, you can go back to washing your load of laundry with cool water rather than hot water.
Pin This Project!