How Long Does It Take To Tie Dye A Shirt
Making tie-dye shirts is a fun activity but knowing how long it takes to tie-dye a shirt is helpful in planning how much time you will need to complete the project. Allowing enough time for each step of the tie-dye process is vital to the tie-dye success overall. Making sure that you allow enough time, especially for key steps will allow your finished project to have gorgeous vibrant colors that you can enjoy.
Before you Begin
Before you start making your tie-dye project, one of the first things you will need to do is select the type of dye you want to use. Most craft stores have several different options to choose from. You can select individual powdered dye packets or tie-dye kits.
Tie Dye Supplies
- T-shirt or other item to tie dye
- Tie dye powder
- Rubber bands
- Gloves
- Plastic bags
- Plastic table cloth
The Best Tie-Dye Kit
There are a lot of options, so what are some of the best tie dye kits? It can be a matter of personal preference, however, one of my personal favorite options is from the brand Tulip one-step tie-dye kits. This kit is great for a tie dye party, however, you will want to make sure that there is enough dye, depending on how many people will be making tie-dye projects. Another good option is the Tulip artisan tie dye kits.
Dye Powder
Another option is to select individual packets of powdered dye in your desired different colors. Often the individual packets of powder dye have more volume in them than tie dye kits do, however, the cost-benefit may not necessarily be there, depending on how many colors you want to use. Tulip tie-dye products can also be found in individual packets of powdered dye.
Whatever type of tie-dye powder you choose to use, whether it is in a kit or not, make sure that your powdered dye is a type of fiber-reactive dye. This will ensure that it sets better and does not all rinse out.
Now let’s look at some easy step-by-step instructions you can follow for making your tie-dye project. I have outlined the steps below with an estimated time to complete each one.
Best Items to Tie Dye
There are many different things you can make with tie-dye. The best and most common project is to tie-dye t-shirts. Other fun projects include tie-dye sweatshirts, canvas bags, sweatpants, tennis shoes, and even socks. Just remember, when you are making a tie-dye project, you are going to have the best results with cotton fabric, linen, hemp, rayon, or silk. Other types of fabric won’t work well.
Step-by-Step Instructions
1. Pre-Wash the Cotton T-Shirt (Approximate Time: 1 hour)
It is important that you first wash the shirt that you intend to tie dye. This is especially important if it is a new shirt, as it could still have residue on it from the factory.
If you’re using old white shirts, it is still a good idea to wash and dry the shirts using laundry detergent, but without using fabric softener, before tie-dying them. Before starting the tie-dye project, make sure that you are using a dry shirt that has been freshly washed.
2. Gather your Supplies (Approximate Time: 10 minutes)
Before you start with the actual dying process, you will want to gather all of the supplies, so that they are ready to use. Here are some supplies that you will want to have on hand:
- freshly washed white T-shirt
- tie-dye kit, or powdered dye colors
- rubber bands (string or zip ties will work in a pinch)
- plastic bag or plastic wrap
- squeeze bottle or squirt bottle to mix each dye color
- disposable rubber gloves
- soda ash, which is optional, depending on what type of dye you are using
3. Prepare Your Work Surface (Approximate Time: 5 minutes)
You will want to prepare the work surface so that it is protected from any dye residue. It’s also important to keep in mind any clothes you’re wearing may be permanently dyed as well.
It’s a good idea to spread a plastic cover over any area you wish to protect. You could also consider tie-dying outside, or in a sink, on a wire rack to keep the dye project separated from the bottom of the sink.
4. Select the Tie Dye Pattern and Fold Project (Approximate Time: 10 minutes)
There are many ways you can choose to fold your tie-dye project. You will want to determine what pattern you want to dye your shirt, then prepare it accordingly.
Secure the project in place with rubber bands, string, zip ties, or any other type of disposable item you have on hand that will hold your T-shirt in place.
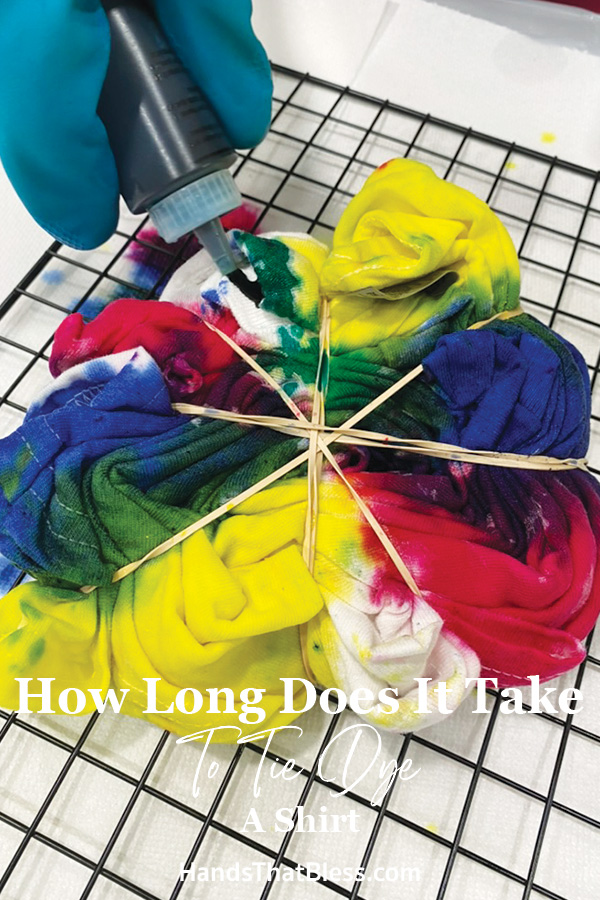
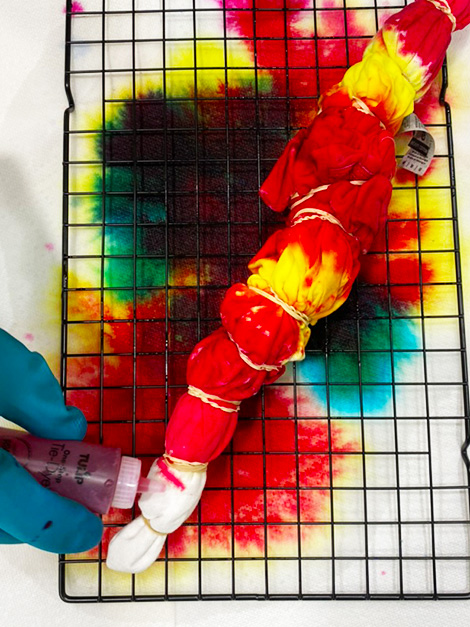
5. Prepare and Apply the Dye (Approximate Time: 20 minutes)
Make sure to wear rubber gloves before you start handling the dye colors. It’s very important that you wear gloves to protect your skin from the colored dye.
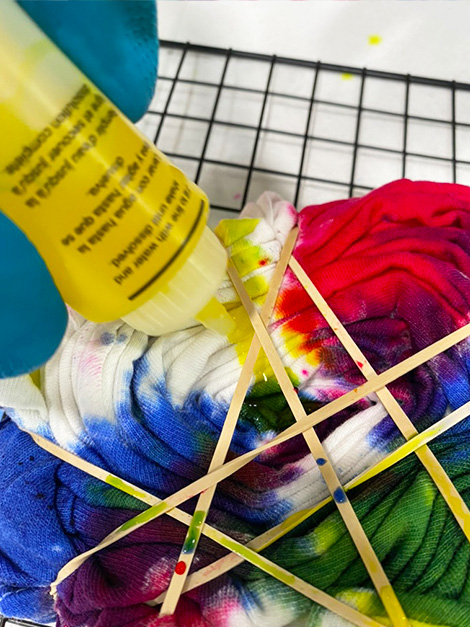
Select your dye colors, then add lukewarm water or warm water to the bottles with your powdered dye. Make sure to mix the dye powder into warm water before you start.
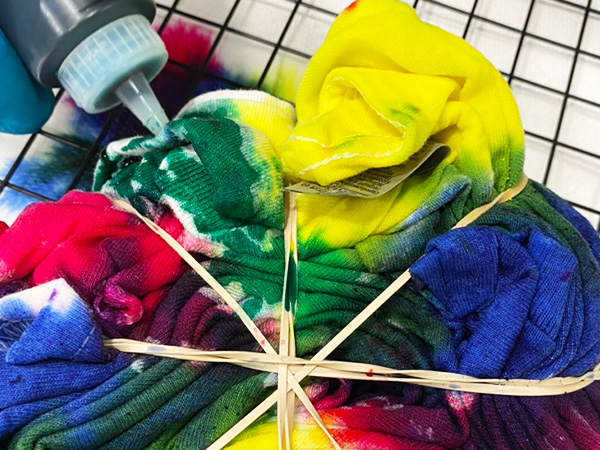
A good rule of thumb is to use the squirt bottles to apply your dye colors onto your freshly washed shirt. Use the rubber bands as sectional dividers for each color. Make sure to leave a little space in between the colors so that you have white space showing through if desired.
Be sure to apply enough dye, both the top and the bottom, so that the dye goes all the way through each section, covering your desired part of the shirt to make a bright pattern.
After you have applied dye to the entire tie-dye project, seal each shirt individually in a plastic bag. Make sure to remove any excess air and seal the bag securely. Place the sealed bag in a warm location, but dry location, allowing the dye to set.
6. Let the Dye Set (Approximate Time: 12 – 24 hours)
Allowing plenty of time for the dye to set in your project once it is complete is a very important step that you don’t want to overlook. You will want to let the fabric sit for a minimum of 6-8 hours, in a warm climate, preferably around 70°F for the best results.
The best practice to get color vibrancy is to let your tie-dye projects sit for 12 to 24 hours. The longer that your tie-dye project sits, the bolder the color your project will have once finished. You will not want to let the project sit any longer than 24 hours, because it could start to mold if it sits too long. The ideal amount of time is to let it rest for 12 to 24 hours.
7. Cold Water Rinse (Approximate Time: 10 minutes)
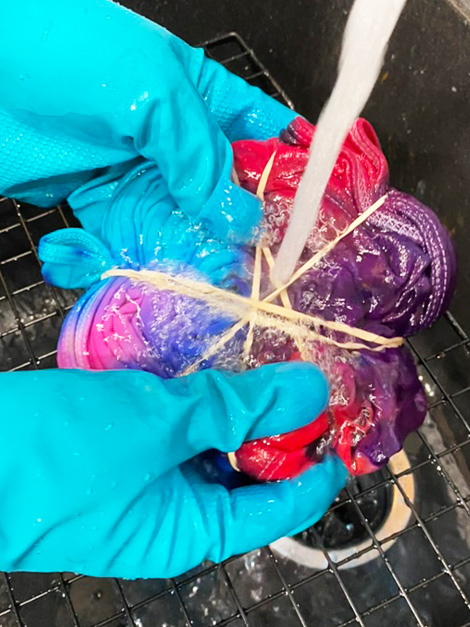
After you have allowed plenty of time for the tie-dye colors to set into your project, it’s time to rinse any excess dye from your project. First, you will want to remove the dye project from the plastic bag.
Place it under cold running water until the water begins to run clear. Then, remove the rubber bands securing your T-shirt in place.
Discard the rubber bands, and carefully open your project. Hold the T-shirt flat and continue rinsing it under cold running water until the water runs clear once more. After it has been thoroughly rinsed, gently squeeze any excess water from the T-shirt.
8. Wash and Dry the Tie Dye (Approximate Time: 1 hour)
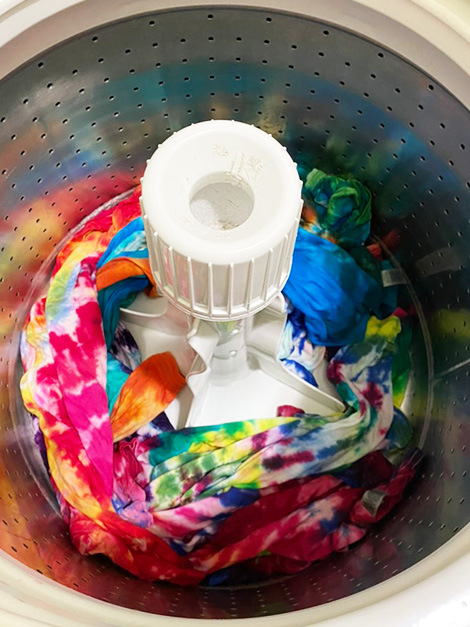
Add your tie-dye projects into the washing machine and turn your washing machine to use hot water for the wash cycle. The hotter the water, for the step, the better. Add a small amount of laundry soap into the washing machine, do not add fabric softener at this time. Start the wash cycle, to wash your tie-dye shirts the first time.
After the wash cycle is complete, transfer your tie-dye shirts to the dryer. Run your normal dryer cycle, until the tie-dye shirts are completely dried.
At this point, your tie-dyed projects are now ready to use and enjoy!
9. Future Washing Instructions
When your tie-dye shirt is finished, you may want to consider washing it separately from your other laundry for the first wash or two. You can continue to use cool water for your tie dye after that first initial washing in hot water.
After it has been through your washing machine a few times, you can wash it with the rest of your colored laundry going forward.
FAQs
How Long Does It Take To Tie Dye A Shirt?
The amount of time it takes to complete all of the steps involved with making a tie-dye shirt may vary, especially when it comes to the amount of time it takes to wash and dry the shirt before you make the tie-dye project, and after the tie-dye project is finished.
On average, it will take approximately 27 hours, from start to finish to complete all the steps outlined above, especially if you let your tie-dye project set for 24 hours, after the dye has been applied.
How long does tie-dye need to sit?
When you are making a tie-dye shirt, you will want to let it sit for a minimum of 8 hours, but you will have the best results when you let the tie-dye project set for 12-24 hours.
What’s the best type of dye to use?
My personal favorite type of dye to use when making a tie-dye project its Tulip dye. This is because it comes with soda ash in it, and the color tends to turn out much better.
Can tie-dye sit for too long?
Yes, if you let your tie-dye sit for too long it can get moldy and turn yucky. This is why we suggest letting it set for up to 24 hours.
How do I keep the dye from drying out while it sets?
The best way to keep your tie-dye from drying out while it sets is to seal it inside of a plastic bag, right after you have finished adding the color to it. That way the plastic bag traps the moisture, inside keeping the shirt damp while the color sets.
What is Reverse Tie Dye?
Traditional tie dye is when you take a plain white shirt, fold it into a pattern, then take colored dye to apply your desired tie dye pattern. There are two different ways that you can make reverse tie-dye.
The first, and most common way is when you take a plain black shirt and use a bleach solution to make bleach tie dye on the shirt. After the bleach dye is applied, you will want to only let it sit for a short amount of time before rinsing the bleach out. You will then want to thoroughly rinse, wash, and dry the shirt.
After it has been completely rinsed, washed, and dried, you can go back and add color dye to the bleach spots to make it color dyed, or you can simply leave it as bleach and black tie-dyed. This is the most common way to make reverse tie-dye.
Another way to make reverse tie-dye is by using a white shirt and adding your tie-dye colors as is traditional. Then, take the black dye, and apply it where your white spaces would normally be.
This version of reverse tie-dye is finished out, by letting the dye set for a minimum of 6 to 8 hours or up to 24 hours. After that has been set, thoroughly rinse it in cold water, then run it through a normal wash cycle using hot water and dry it on a normal cycle.
The Beauty of Tie-Dye
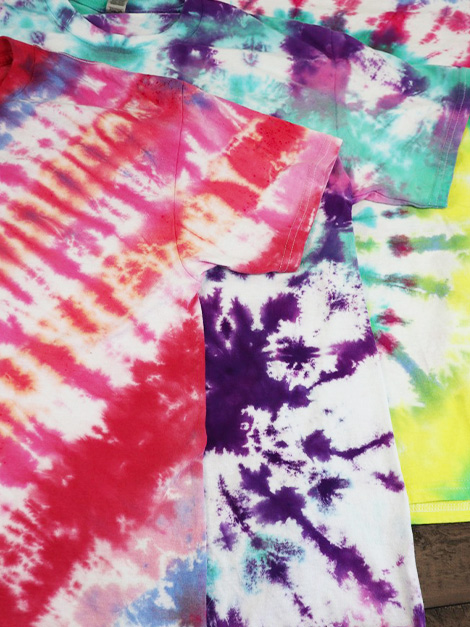
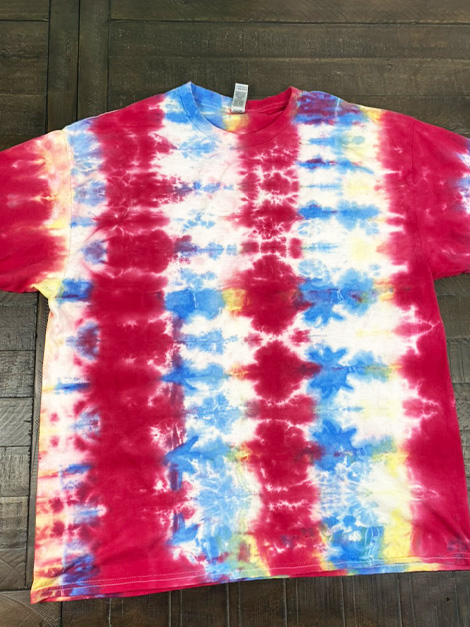
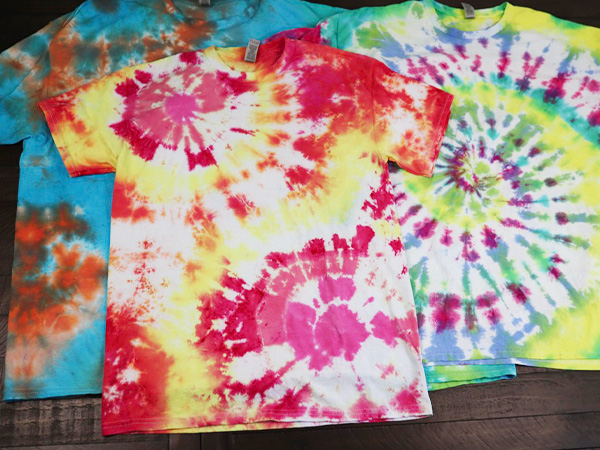
The beauty of making tie-dye is that it is a creative process that everyone can enjoy doing, and each individual can make their own creations. There are no two tie-dye shirts that are exactly the same. You can enjoy the beautifully intense colors of your tie-dye project and show off your designs to all your friends when you wear your T-shirt.
Now that you have an approximate timeline, of how long each step takes to complete the tie-dye process, you can plan out your next tie-dye party, so that everyone can enjoy making their own creative tie-dye project!
I hope that this tutorial has been very helpful to you! Happy tie-dying!
Find Us Online!
Be sure to follow us online on your favorite social media platform!
How Long Does It Take To Tie Dye A Shirt
Materials
- freshly washed white T-shirt
- tie-dye kit or powdered dye colors
- rubber bands string or zip ties will work in a pinch
- plastic bag or plastic wrap
- squeeze bottle or squirt bottle to mix each dye color
- disposable rubber gloves
- soda ash which is optional, depending on what type of dye you are using
Instructions
Pre-Wash the Cotton T-Shirt (Approximate Time: 1 hour)
- It is important that you first wash the shirt that you intend to tie dye. This is especially important if it is a new shirt, as it could still have residue on it from the factory.
- If you’re using old white shirts, it is still a good idea to wash and dry the shirts using laundry detergent, but without using fabric softener, before tie-dying them. Before starting the tie-dye project, make sure that you are using a dry shirt that has been freshly washed.
Gather your Supplies (Approximate Time: 10 minutes)
- Before you start with the actual dying process, you will want to gather all of the supplies, so that they are ready to use.
Prepare Your Work Surface (Approximate Time: 5 minutes)
- You will want to prepare the work surface so that it is protected from any dye residue. It’s also important to keep in mind any clothes you’re wearing may be permanently dyed as well.
- It’s a good idea to spread a plastic cover over any area you wish to protect. You could also consider tie-dying outside, or in a sink, on a wire rack to keep the dye project separated from the bottom of the sink.
Select the Tie Dye Pattern and Fold Project (Approximate Time: 10 minutes)
- There are many ways you can choose to fold your tie-dye project. You will want to determine what pattern you want to dye your shirt, then prepare it accordingly.
- Secure the project in place with rubber bands, string, zip ties, or any other type of disposable item you have on hand that will hold your T-shirt in place.
Prepare and Apply the Dye (Approximate Time: 20 minutes)
- Make sure to wear rubber gloves before you start handling the dye colors. It’s very important that you wear gloves to protect your skin from the colored dye.
- Select your dye colors, then add lukewarm water or warm water to the bottles with your powdered dye. Make sure to mix the dye powder into warm water before you start.
- A good rule of thumb is to use the squirt bottles to apply your dye colors onto your freshly washed shirt. Use the rubber bands as sectional dividers for each color. Make sure to leave a little space in between the colors so that you have white space showing through if desired.
- Be sure to apply enough dye, both the top and the bottom, so that the dye goes all the way through each section, covering your desired part of the shirt to make a bright pattern.
- After you have applied dye to the entire tie-dye project, seal each shirt individually in a plastic bag. Make sure to remove any excess air and seal the bag securely. Place the sealed bag in a warm location, but dry location, allowing the dye to set.
Let the Dye Set (Approximate Time: 12 – 24 hours)
- Allowing plenty of time for the dye to set in your project once it is complete is a very important step that you don’t want to overlook. You will want to let the fabric sit for a minimum of 6-8 hours, in a warm climate, preferably around 70°F for the best results.
- The best practice to get color vibrancy is to let your tie-dye projects sit for 12 to 24 hours. The longer that your tie-dye project sits, the bolder the color your project will have once finished. You will not want to let the project sit any longer than 24 hours, because it could start to mold if it sits too long. The ideal amount of time is to let it rest for 12 to 24 hours.
Cold Water Rinse (Approximate Time: 10 minutes)
- After you have allowed plenty of time for the tie-dye colors to set into your project, it’s time to rinse any excess dye from your project. First, you will want to remove the dye project from the plastic bag.
- Place it under cold running water until the water begins to run clear. Then, remove the rubber bands securing your T-shirt in place.
- Discard the rubber bands, and carefully open your project. Hold the T-shirt flat and continue rinsing it under cold running water until the water runs clear once more. After it has been thoroughly rinsed, gently squeeze any excess water from the T-shirt.
Wash and Dry the Tie Dye (Approximate Time: 1 hour)
- Add your tie-dye projects into the washing machine and turn your washing machine to use hot water for the wash cycle. The hotter the water, for the step, the better. Add a small amount of laundry soap into the washing machine, do not add fabric softener at this time. Start the wash cycle, to wash your tie-dye shirts the first time.
- After the wash cycle is complete, transfer your tie-dye shirts to the dryer. Run your normal dryer cycle, until the tie-dye shirts are completely dried.
- At this point, your tie-dyed projects are now ready to use and enjoy!
Future Washing Instructions
- When your tie-dye shirt is finished, you may want to consider washing it separately from your other laundry for the first wash or two. You can continue to use cool water for your tie dye after that first initial washing in hot water.
- After it has been through your washing machine a few times, you can wash it with the rest of your colored laundry going forward.
What’s Next? More Tie Dye Tutorials
You might enjoy my Reverse Tie-Dye Patterns and Folding Techniques, How to Tie Dye Hoodies, and How to Tie Dye Sneakers!
PIN for Later!